Gluten-Free Salted Caramel Banana Cupcakes
- Jennine Bryant
- May 6, 2021
- 4 min read

Updated: Jun 9, 2021

Everyone ends up with a couple of blackened bananas at the bottom of the fruit bowl once in a while. It doesn’t make you a bad person with a terrible diet, at least that’s what I tell myself. Bananas seem to turn from perfectly ripe to squishy and brown faster than the speed of light (seriously, someone should investigate that, we could harness banana decomposition to travel across the universe), so, it can be hard figuring out what to do with them once they are past the stage of being pleasantly edible. Luckily, the more brown they are, the better they are for baking! Yay!
But then comes the dilemma of what to bake with your old bananas. Well, let me make your life a little easier and answer that question for you - bake these cupcakes!
Notes On How To Do It:
First, let me say that this recipe may seem a bit fussy and complicated - it does cover all bases which includes making a salted caramel sauce. However, once you get started you'll realise that it's actually pretty straightforward and less time consuming than you think it’ll be.
Though, if you want to take some shortcuts, if you don't have the time, patience or capacity to bake all of the components, nobody is going to judge you (least of all me). You can buy some amazing jars of caramel sauce from the supermarket and Betty Crocker makes a great salted caramel frosting, so just remember that those options are available to you if you fancy these amazing cupcakes but don’t want to make it all from scratch.

(P.s. How beautiful is that jar of Cloudberry sea salted caramel spread?! I'm in love)
With that out of the way, here are a few hopefully helpful notes:
Don't forget to take the cupcakes out of the cupcake pan after a few minutes and put them on a cooling rack so they don’t get soggy bottoms. Alternatively, you can put a few grains of rice at the bottom of each cup of the cupcake pan, they absorb any moisture and keep your cupcake bottoms dry!
Wait until the cupcakes have cooled a little and firmed up before scooping out the centre so they don't crumble (remember gluten-free flour isn't as sturdy as glutenous flour).
When making the caramel sauce: adding cool ingredients to the hot sugar will cause everything to bubble up. This is completely normal and expected, so don't worry! Keep stirring and follow the instructions, it'll all work out fine. Probably.
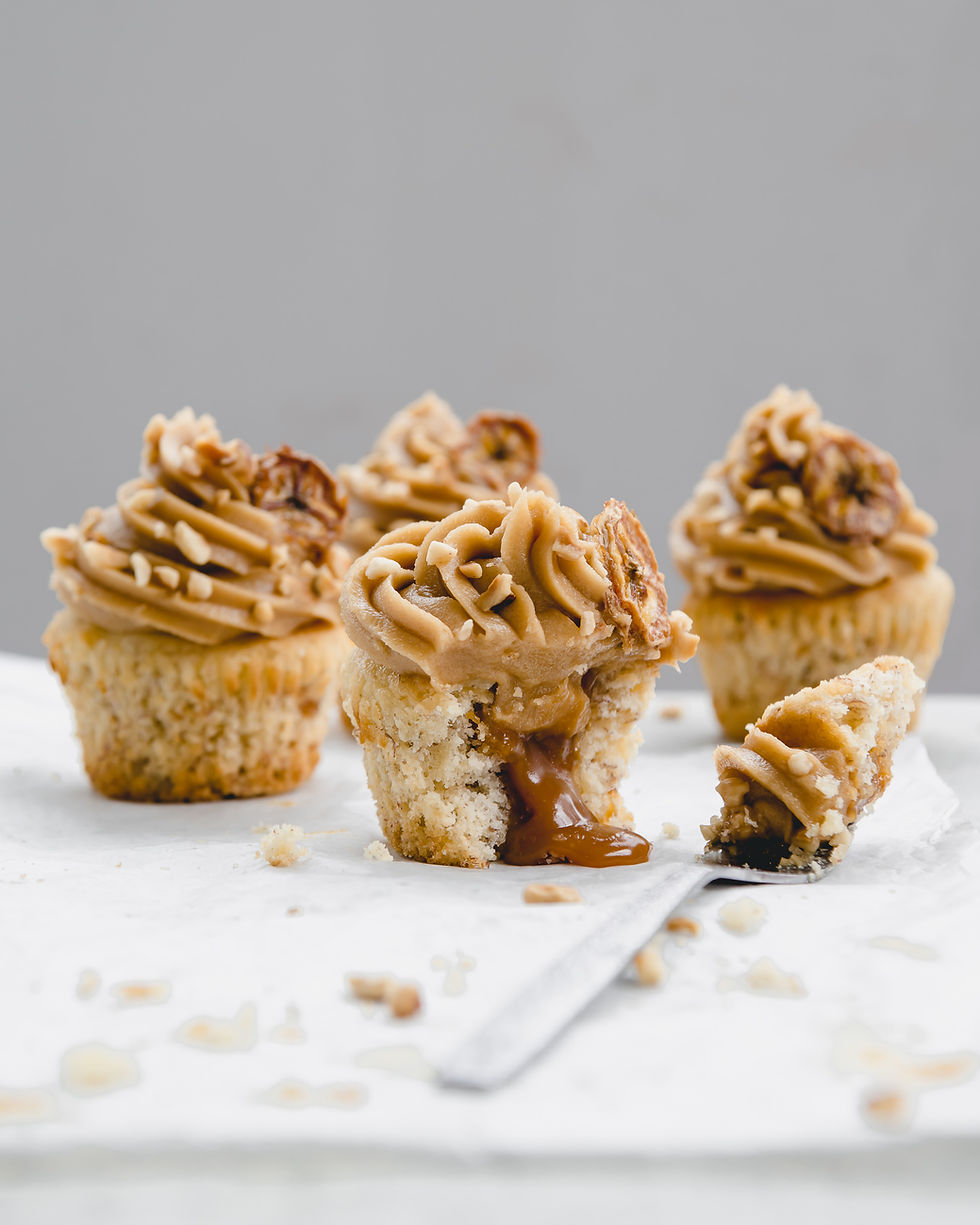
Toppings: the world is really your oyster here, but my top topping suggestions are: A sprinkling of chopped hazelnuts, chocolate chips, dried banana chips, or, if you are feeling extra salty, some flaked sea salt.
Don’t forget to drizzle more caramel sauce on the top just before serving to make the cupcakes even more decadent! Remember to bring napkins though, to catch your drool...and then the caramel sauce.

Gluten-Free Salted Caramel Banana Cupcakes
Prep time: 30min
Baking time: 20 mins
Serves: 18 cupcakes
Ingredients
For the cupcakes:
3 Bananas
210g caster sugar
80g Butter (softened)
2 medium eggs
1 teaspoon vanilla extract or vanilla bean paste
3-4 tablespoons milk
335g gluten free self-raising flour
1 ¼ teaspoons Baking Power
For the Salted caramel sauce
200g granulated sugar
90g salted butter, room temperature cut up into pieces
120ml double cream
1 teaspoon salt
For the Salted Caramel Frosting
150g butter (softened)
150g icing sugar
150g salted caramel sauce
Method
For the cupcakes
1.) Preheat the oven to 150°C fan oven and line a cupcake tray with cases ready for your batter.
2.) Combine the sugar and butter and whisk until the mixture is light and fluffy, this should take 3 or 4 minutes.
3.) Mash the bananas until no lumps remain and then add them to the sugar and butter and mix until combined.
4.) In a separate bowl or jug, combine the eggs, the vanilla extract and the milk. Add this to the mixing bowl with the bananas, sugar and butter. Combine, stopping to scrape down the sides of the mixing bowl part way through to make sure that everything is well mixed.
5.) Mix the baking powder into the flour and then add this to the mixture, and whisk until just combined.
6.) Using a serving spoon or ice cream scoop, fill the cupcake cases ⅔ full with the batter, then put into the oven and bake for roughly 20 minutes. They will be done when the cupcakes are springy to the touch.
7.) Take the cupcakes out of the baking tray after 5 minutes and leave to cool on a cooling rack.
For the salted caramel sauce
1.) Add the sugar to a pan and heat. The sugar will slowly melt, first going clumpy and eventually turning into a liquid. Keep stirring it throughout this stage.
2.) When the sugar has melted entirely and is an amber colour, add in the butter cubes and stir quickly until the butter is combined.
3.) Leave this to cook for 1 minute without stirring, then slowly add the cream, stirring constantly.
4.) Once the cream is incorporated, let the caramel sauce cook for 1 more minute then take it off the heat to cool and thicken.
Once cool, store in the fridge.
For the salted caramel frosting
1.) Add the butter and icing sugar to a mixer and whisk until combined.
2.) Leaving the mixer on, slowly add the caramel sauce until it is all added and is well combined.
3.) Stand back and admire your work for a while, how does it feel to be a master baker?!
To assemble
1.) Cut a hole into the tops of the cupcakes and remove the excess sponge (you can enjoy eating this while you put together the cupcakes! At least, that’s what I do…)
2.) Using a spoon, fill the hole in the cupcake with salted caramel sauce. The amount you will need really depends on the size of the hole that has been made. I find I normally use between a tablespoon and a teaspoon of caramel sauce to fill the cupcake hole.
3.) Time for the frosting! If you’d like to use a piping bag to swirl the frosting onto the cupcake that’s brill, or, if you prefer your cupcakes more rustic and ready to go just dollop on a tablespoon or so of the frosting, spread it out and top with whatever you like!


Comments